
How to Create a Table of Contents in Word – how can I insert one
![]() This week’s hint and tip is about how to create a table of contents in Word document. It also covers how you can update it once it has been inserted. This is on our Intermediate Word training course and it covers where this option is found and how to use it. We are going to go through it now below.
This week’s hint and tip is about how to create a table of contents in Word document. It also covers how you can update it once it has been inserted. This is on our Intermediate Word training course and it covers where this option is found and how to use it. We are going to go through it now below.
What is a Table of Contents
The table of contents feature in Word is a way that you can have Word generate a table of contents for you automatically. In the past you might have done this manually yourself, but by using Word styles in your documents then you can use this feature instead. It is a really useful feature that allows you to locate topics in a document easily rather than having to go through each page.
How to create a Table of Contents
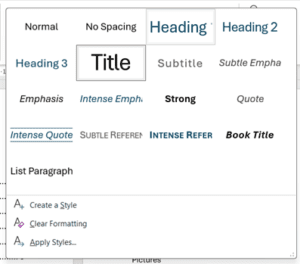
Firstly, you need to make sure that you use heading styles in your document as Word uses these to create the table of contents.
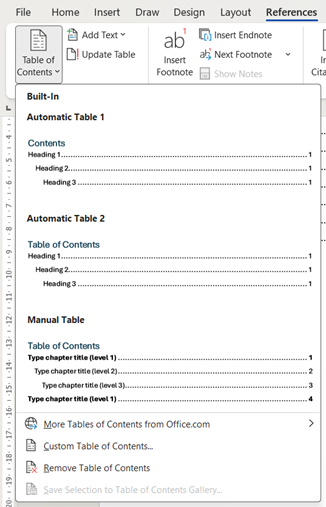
Once you have set up your document with these styles, you can then go to the References Tab and create one from there. Along the ribbon there is a ‘Table of Contents’ button that you start from. Clicking on this brings up a drop down menu for you. You can choose from a built in styled table of contents or you can choose the option for a custom table of contents.
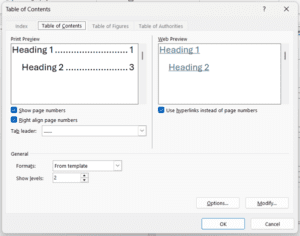
The custom table of contents allows you to choose the number of levels you want as well as some other options. There is a preview option of what it will look like to help you decide.
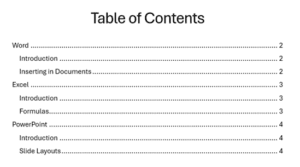
Once you click OK, your table of contents will then be inserted into the document as shown below. This is then ready for you to use as needed in the document.
Updating the Table of Contents
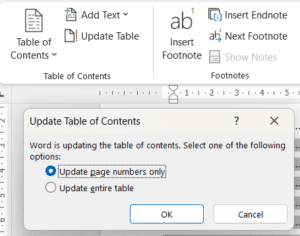
There might be times where you make a change to your headings in your Word document. If this is the case, you will then need to update the table of contents to match that change. To do this, click into the table of contents and choose the ‘Update Table’ option on the References Tab ribbon. You can also right hand click into your table of contents to find this. From here you can choose either option depending on what you want to update, then click OK.
This will have then updated the table of contents for you.
The video below shows you how to create a table of contents in a Word document and also how to update it after. Inserting a table of contents into your Word document can help save you time rather than having to do it manually.
Take a look below at the video to find out more and then try it out on your own computer!
We hope you have enjoyed this hint and tip on how to create a table of contents in Word. Why not take a look at our previous one on using Copilot to create a PivotTable in Excel?