
Publisher Basics Pictures – inserting a picture, do you know the steps to do it?
![]() This week’s hint and tip follows the series that we have been doing on basics in the Microsoft Office packages. This week is looking at inserting pictures in Publisher.
This week’s hint and tip follows the series that we have been doing on basics in the Microsoft Office packages. This week is looking at inserting pictures in Publisher.
 Inserting a Picture
Firstly, make sure that you have your publication open that you want to insert a picture in to. If you don’t have one open yet, make sure you have a blank publication open. From here go to the Insert Tab at the top and on the Ribbon there will be a button called ‘Pictures’.
 Once you click on this button, a window will appear. Here you can navigate through your filing system to locate the picture that you want to insert into your publication. Once you find the image, select it and click on the ‘Insert’ button. This will then insert your picture into your publication for you.
Editing a Picture
Once the picture has been inserted you will notice that an extra Tab has appeared at the end called Format. This is found under a heading of ‘Picture Tools’. This tab only appears when you have a picture selected.

This Tab has lots of formatting tools that you can use on your picture, some being adjusting tools, picture styles and picture effects. The Wrap Text button is very useful as it allows you to set how text will wrap around the picture in your publication. As well as wrap text, there is a ‘Rotate Objects’ button. This option can be very useful especially if the picture is the wrong way around.
Moving and Re-sizing a Picture
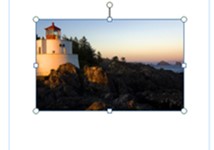
To move the picture, select it, the cursor will change to a white arrow plus a cross. This is the moving option. Now click and drag and it will allow you to move the picture to where you want it to be in the publication.
To re-size the picture, just use the white handles (the white dots) positioned around the outside of the picture. The white handles in the corners will re-size in 2 directions at once. Whereas the handles in the middle of the outside lines will only re-size in 1 direction; ‘vertically’ or ‘horizontally’.
This was our Publisher basics pictures hint and tip and we hope you liked it! Have you seen our previous Publisher basics hint and tip on inserting text boxes?