
Creating Meetings in Outlook – how do I set up a meeting with someone in Outlook?
![]() This week’s hint and tip is about creating meetings in Outlook and the ways you can create them in Outlook. This is covered on our Outlook training course, but we also we decided to do a hint and tip on it. We are going to go through it now below.
This week’s hint and tip is about creating meetings in Outlook and the ways you can create them in Outlook. This is covered on our Outlook training course, but we also we decided to do a hint and tip on it. We are going to go through it now below.
Meetings in Outlook
Meetings are very similar to appointments but they require another person or persons to accept the event so that both events (meeting dates) appear in both calendars. The invitation is sent by email requiring a response.
When creating meetings it’s sometimes useful to have both emails and calendar open at the same time. To do this, right hand click on calendar icon and select open in new window option (when closing Outlook down use File, Exit rather than the cross as Outlook will remember the view next time you open it up)
How to set up a meeting
When creating meetings, you can either create them by using the meeting option under New Items (this will open a window like that seen below) or you can create an email straight from an email. To create a meeting from an email, click and drag the email over the calendar icon and set up the details when the meeting window comes up.
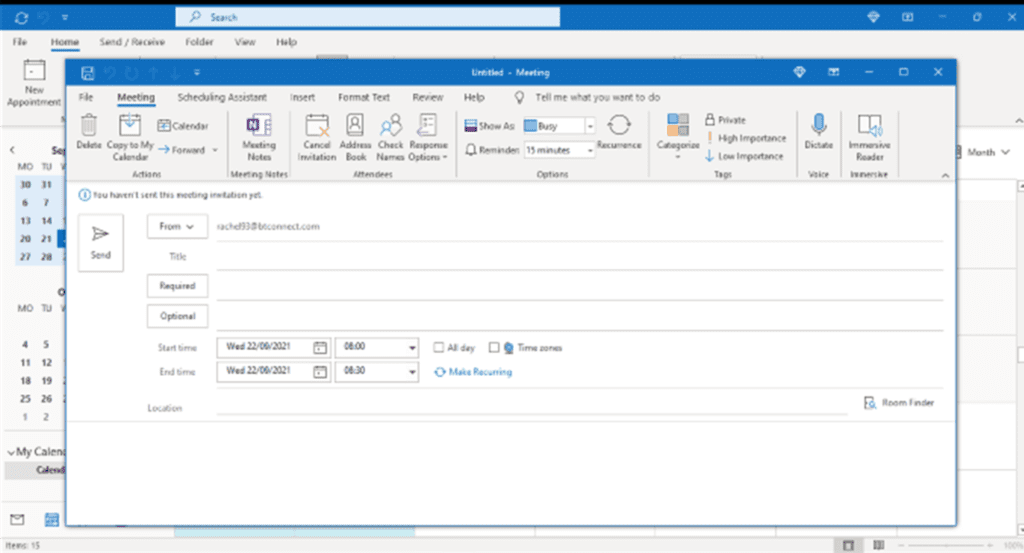
When creating a new meeting in Outlook there are a number of fields that you will fill in. These are:
- Title: this is where you type in the title of the meeting
- Required: this is where you insert the email addresses of the attendees that are required to attend the meeting
- Optional: this is where you can insert any email addresses of attendees to which this meeting is optional
- Start and End time: this is where you put in the details of the date and time of the meeting
- Location: this is where you put in the location in which the meeting will occur
- ‘White space under location field’: this is where you type in a message for all the attendees with any extra information or important details
Once you have set up the meeting, click on the ‘Send’ button. This will then send out the meeting request that you have just set up.
The attendees will then have the option to accept or reject the meeting request that you have sent to them. It will appear as an email in their inbox in Outlook.
We hope you have enjoyed this hint and tip on creating meetings in Outlook. Why not take a look at our previous one on printing a custom range of pages in Word?